Many patients considering veneers wonder what the actual porcelain veneer procedure involves from start to finish. You might be asking yourself questions like “Is it complicated?” or “Will it hurt?” Perhaps you’re curious about how long the entire process takes. This guide outlines each step of the porcelain veneer procedure, helping you understand what occurs at every stage.
The timeline for porcelain veneers typically spans 2-3 appointments over several weeks. Each visit serves a specific purpose in creating your new smile. Understanding the full process can help you feel better prepared and confident about proceeding.
Summary of the Content:
- Porcelain veneers are thin ceramic shells custom-made to cover the front surfaces of teeth. These restorations can address concerns such as staining, chips, misalignment, gaps, and worn enamel.
- Your first step is a comprehensive dental veneer consultation, during which your dentist assesses your suitability, discusses your goals, and develops a personalised treatment plan.
- The tooth preparation for veneers involves removing a small amount of enamel to create space for the veneers, followed by taking impressions and placing temporary veneers.
- Experienced technicians spend 1-3 weeks crafting your custom veneers in a dental laboratory, carefully matching shade, shape, and texture to achieve natural-looking results.
- The final veneer cementation appointment involves removing temporaries, trying in the final veneers for approval, and securely bonding them to your prepared teeth.
- Proper veneer aftercare includes maintaining good oral hygiene, avoiding extremely hard foods, protecting against grinding, and attending regular dental checkups to support long-term longevity.
- Follow-up care includes scheduled appointments to check adaptation, address any concerns, and monitor your adjustment to the new restorations.
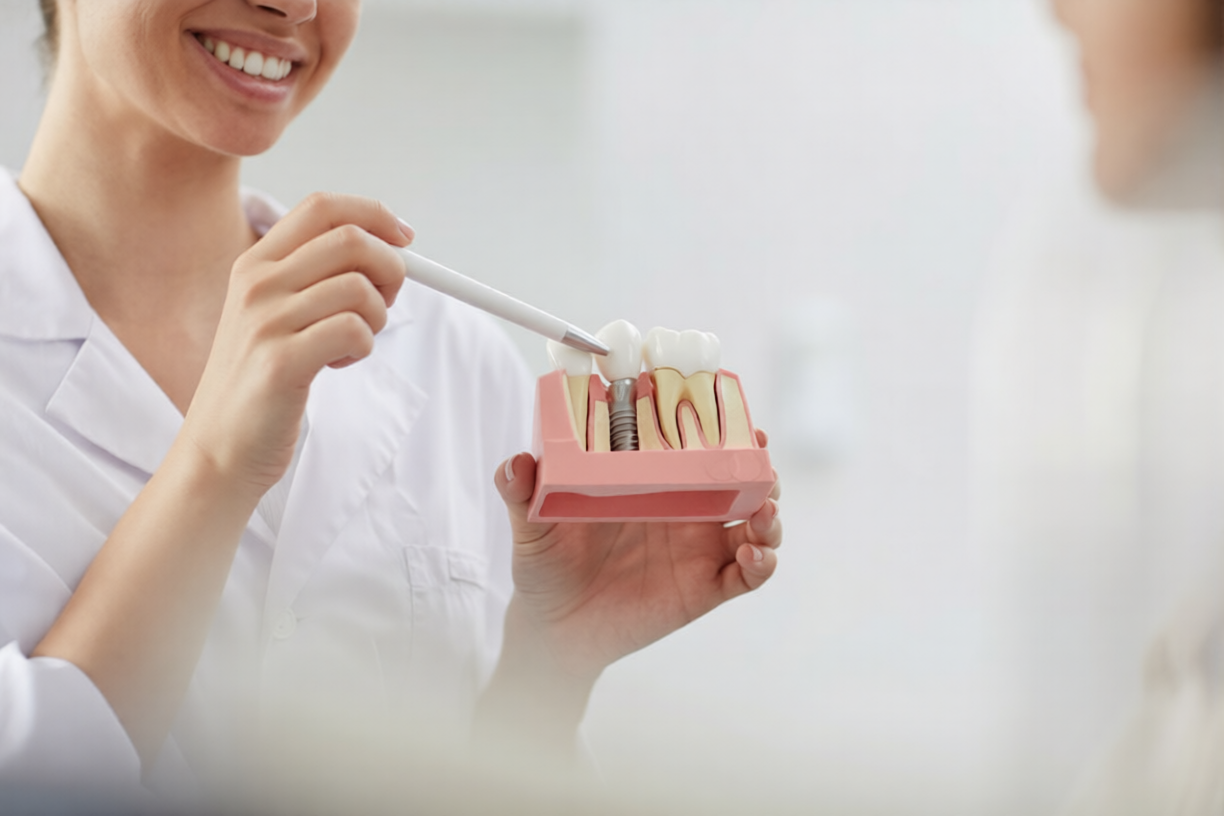
What Are Porcelain Veneers?
Porcelain veneers are thin, custom-made ceramic shells designed to cover the front surface of teeth. These restorations are typically crafted from high-quality dental porcelain that mimics the natural translucency and shine of tooth enamel. When light hits porcelain veneers, they reflect it in ways similar to natural teeth, creating an authentic appearance.
Veneers can address various cosmetic concerns. They’re often chosen for teeth that are stained and don’t respond to whitening treatments. Veneers may also be suitable for teeth with chips or minor damage, slight misalignment that doesn’t require orthodontic treatment, or gaps between teeth. They can also address enamel that has worn down over time.
Many patients choose porcelain veneers because they’re durable and stain-resistant, unlike natural tooth enamel. The ceramic material can maintain its appearance for many years with proper care. Porcelain veneers differ from dental crowns, which cover the entire tooth, and from dental bonding, which uses composite resin applied directly to the tooth surface.
While veneers can improve the appearance of your smile, treatment suitability varies from person to person. Your dentist can help determine whether veneers are an appropriate option for your specific dental situation.
Step 1: Your Initial Dental Veneer Consultation
What Happens During Consultation
Your dental veneer consultation begins with a comprehensive oral examination. Your dentist will evaluate your teeth, gums, and bite to understand your overall oral health. During this appointment, you’ll have the opportunity to discuss your aesthetic goals and any concerns about your smile.
A regular dental veneer consultation includes the following:
- Comprehensive oral examination to assess your teeth, gums, and bite alignment.
- Discussion of your aesthetic goals to understand what aspects of your smile you’d like to improve.
- Review of dental and medical history to identify any factors that might affect treatment planning.
- X-rays and diagnostic imaging to evaluate tooth structure and underlying bone health.
- Candidacy assessment to determine whether veneers are suitable for your specific situation.
- Discussion of veneer types, including porcelain versus composite options and traditional versus minimal-prep approaches.
Not everyone is a suitable candidate for veneers. Your dentist will assess whether this treatment option is appropriate for your individual circumstances. Every patient’s consultation is unique, and depending on your needs, your dentist may suggest other options that could better address your specific concerns.
Key Assessments
Your dentist will conduct several specific evaluations during your dental veneer consultation. These assessments help determine your suitability for veneers and identify any issues that need to be addressed before treatment can proceed.
Critical assessments include the following:
- Tooth structure evaluation to confirm that you have adequate enamel necessary for proper bonding.
- Gum health assessment to confirm there’s no active gum disease (which requires treatment first).
- Bite alignment considerations to identify any issues that might place excessive force on veneers.
- Existing dental work evaluation to examine how crowns, bridges, or fillings might integrate with new veneers.
- Discussion of habits that may affect veneer longevity, such as teeth grinding or nail biting.
Without sufficient enamel, veneers may not bond effectively or may not be the most suitable option. Healthy gums provide a stable foundation for your veneers and contribute to long-term performance. Your dentist can help determine which factors are most relevant to your situation.
Smile Design Process
Many dental clinics now use digital smile design technology and imaging to help visualise potential results. During your dental veneer consultation, you’ll work with your dentist to plan the aesthetic aspects of your treatment.
The smile design process often involves:
- Digital smile design technology and imaging to create visual previews of potential outcomes.
- Discussion of desired shade, shape, and length to align your goals with achievable results.
- Viewing of veneer samples and shade guides to help you understand available options.
- Digital mockups or wax-ups to preview how veneers might look on your teeth.
- Opportunity to ask questions and voice concerns about the procedure, timeline, or expected outcomes.
Seeing physical samples can help you make more informed choices about the appearance you’d like to achieve. These tools can help you and your dentist communicate about aesthetic goals and that you’re working towards the same vision. Your dentist should address your questions thoroughly and help you understand what to expect throughout the process.
What to Discuss
Your dental veneer consultation is the ideal time to discuss practical aspects of treatment. Open communication during this appointment helps you make the right choice for your oral health and aesthetic goals.
Key topics to cover include the following:
- Treatment timeline:
Ask how many visits are required and how much time is needed between appointments for laboratory work. - Number of veneers:
Your dentist can recommend how many veneers are needed to achieve your desired outcome and create balanced aesthetics. - Cost estimates:
You’ll receive information about the total investment required and the available payment options or plans. - Alternative treatments:
Your dentist can explain whether other approaches might better address your concerns depending on your situation. - Realistic expectations:
Your dentist should discuss what outcomes you can reasonably expect from treatment based on your individual circumstances.
Step 2: Preparing Your Teeth for Veneers
The Preparation Appointment
The tooth preparation for a veneer appointment typically occurs 1-2 weeks after your consultation. This timing allows the dental team to prepare for your specific treatment and gives you time to consider your decision. The duration of this visit varies with the number of veneers being prepared and typically ranges from 1 to 2 hours.
Local anaesthesia is used to provide patient comfort during tooth preparation for the veneer process. With proper anaesthesia, the preparation process is typically comfortable. Your dentist will take steps to help you feel as relaxed as possible during your visit.
What to expect at this appointment:
- Scheduling occurs approximately 1-2 weeks after your initial consultation.
- Duration depends on the number of veneers being prepared and typically ranges from one to two hours.
- Local anaesthesia is administered to maintain comfort throughout the procedure.
- A comfortable experience is normal when appropriate anaesthesia is used, though individual experiences can vary.
Enamel Removal Process
Tooth preparation for veneers involves removing a small amount of enamel from the front surface of your teeth. Understanding why this step is necessary and what it involves can help you feel more prepared for the appointment.
Key aspects of enamel removal:
- Why it’s necessary:
Removing enamel creates space for veneers to sit flush with surrounding teeth, preventing them from appearing bulky or protruding. - Amount removed:
Your dentist typically removes approximately 0.5-1 mm of enamel from the front tooth surface. - Irreversible process:
Once enamel is removed, your teeth will always need some form of cover. This is a long-lasting change to tooth structure. - Conservative approach:
Modern techniques prioritise minimal enamel removal whenever possible to preserve tooth structure. - Variations available:
Some patients may be candidates for minimal-prep or no-prep veneers, which require less or no enamel removal.
Taking Impressions
After preparing your teeth, your dentist will take impressions to capture precise measurements. This step is essential for creating veneers that fit properly and look natural.
The impression process includes the following:
| Step | Purpose |
| Digital scanning or traditional impressions | Captures exact measurements of your tooth size, shape, and positioning. |
| Bite relationship recording | Documents how your upper and lower teeth come together. |
| Colour and shade selection | Checks that your final veneers match your desired aesthetic. |
| Photographs for the laboratory | Provides visual reference for the ceramist creating your veneers. |
These detailed records provide the laboratory with all the information needed to fabricate veneers that fit properly and meet your aesthetic goals. Your dentist may take photographs from multiple angles to capture the nuances of your smile and surrounding teeth.
Temporary Veneer Placement
Temporary veneers serve an important function while your final veneers are being fabricated in the laboratory. Understanding their purpose and how to care for them helps the transition to your final restorations.
About temporary veneers:
- Purpose:
Temporary veneers protect your prepared teeth while final veneers are being created. - Material:
These are typically made from temporary acrylic or composite resin. - Appearance:
Temporaries provide a preview of your final smile proportions, though they won’t match the quality or appearance of your final restorations. - Duration:
You’ll wear temporary veneers for 1-3 weeks while the lab creates your final veneers. - Care instructions:
Avoid very hard, sticky, or staining foods during this period to prevent damage to your temporaries.
Temporary veneers are designed to be functional and protective, but they’re not as strong or aesthetically refined as your final porcelain veneers. Properly caring for them during the waiting period helps them remain intact until your next appointment.
What to Expect After Preparation
After tooth preparation for veneers, some patients experience certain sensations as they adjust to having temporary veneers. Understanding what’s normal can help you feel more confident during this transition period.
Common experiences after preparation:
- Temporary temperature sensitivity may occur and is typically mild in most patients.
- A slight adjustment period for speech and eating is normal as you adapt to your temporary veneers.
- Temporary veneers may feel slightly bulky initially, though this feeling often diminishes as you become accustomed to them.
- Proper care with temporary restorations is important to prevent damage before your final appointment.
The temporary phase is an important part of the tooth preparation for the veneer process. It protects your teeth and gives you a preview of your new smile while the laboratory crafts your final restorations.
Step 3: Custom Veneer Creation in the Dental Laboratory
The Laboratory Process
While you’re wearing temporary veneers, dental technicians in a laboratory are crafting your final restorations. The timeline for veneer fabrication typically spans 1-3 weeks from when your impressions are sent to the laboratory.
The fabrication process involves:
- Professional craftsmanship:
Ceramists use your dentist’s specifications to create veneers tailored to your needs. - Layering technique:
Multiple layers of porcelain are carefully applied and shaped to achieve natural-looking results. - High-temperature firing:
The ceramic material is fired at high temperatures to strengthen and set the porcelain. - Quality control:
Precision checking occurs throughout fabrication to help veneers meet specifications.
Each veneer is individually crafted to match the detailed instructions and measurements your dentist provided.
Customisation Elements
Creating natural-looking veneers involves careful attention to multiple aesthetic factors. Shade matching involves layering multiple porcelain shades to create natural translucency similar to tooth enamel. Shape design helps the contours match your facial features and desired aesthetic goals. Size specifications are based on precise measurements to keep veneers fit properly and align with surrounding teeth.
Texture creation involves crafting surface characteristics that mimic the subtle texture of natural tooth enamel. Characterisation includes adding subtle details, such as variations in opacity, to create realistic depth and dimension. These customisation elements work together to create veneers that aim to look natural rather than artificial.
Quality Considerations
High-quality materials are designed to resist staining and wear over time, though individual results can vary based on care and oral habits. Precision crafting aims to support proper marginal fit where the veneer edge meets your natural tooth. Attention to aesthetic details helps create natural-looking results that complement your smile.
Communication between your dentist and the laboratory technician so that specifications are understood and met throughout the process. Quality fabrication is essential to achieving results that meet your expectations.
During the Waiting Period
The time between tooth preparation for veneers and your final appointment involves living with temporary veneers. Avoiding potentially damaging foods or habits can help protect your temporaries before your final appointment. Very hard foods, sticky foods, or habits like biting fingernails could dislodge or damage temporary veneers.
Maintaining normal oral hygiene is important, though you’ll need to be careful around temporary veneers when brushing and flossing. Noting any concerns to discuss at your final appointment helps your dentist address issues when placing veneers.
Managing expectations about temporary versus lasting aesthetics helps you understand that temporaries are functional rather than final. Temporary veneers may feel bulky, appear slightly different in colour, or have other characteristics that won’t be present in your final restorations. This waiting period typically lasts 1-3 weeks, allowing the laboratory adequate time to craft veneers that meet your aesthetic goals and functional needs.
Step 4: Final Bonding and Veneer Cementation
The Cementation Appointment
The veneer cementation appointment typically occurs 1-3 weeks after tooth preparation. This visit usually takes 1-2 hours, depending on the number of veneers being placed. This appointment requires precision and adequate time to support proper placement. Local anaesthesia may be used for your comfort during the veneer cementation process.
Try-In Process
Your dentist will carefully remove your temporary veneers and thoroughly clean your teeth. The final veneers are then initially tried in place without cement. Try-in paste helps check colour, fit, and appearance. This is your opportunity to review and approve the veneers before final bonding. If minor adjustments are needed to length or contour, these can often be made at this stage.
The Bonding Process
Tooth preparation for veneers continues with surface preparation for bonding. Your dentist will etch the tooth surface with phosphoric acid to create an ideal bonding surface. A bonding agent is then applied to the prepared tooth.
The inner surface of each veneer is also cleaned to optimise adhesion. Dental cement is selected and shade-matched to achieve the desired final colour. Your dentist places each veneer with appropriate seating pressure. Excess cement is carefully removed from the margins where the veneer meets your tooth.
Curing and Setting
A specific light hardens the adhesive cement. Your dentist will use the light from multiple angles to complete polymerisation. This systematic treatment approach helps prevent incomplete bonding. The process securely bonds your veneers to your tooth structure.
Final Refinements
After veneer cementation, your dentist will make final adjustments to your bite so the veneers don’t interfere with your natural bite pattern. Margin finishing smooths the transition between veneer and natural tooth.
Polishing creates a smooth, natural surface texture. Your dentist will check flossing to maintain proper contact between teeth. You’ll have a final opportunity to view your new smile in the mirror and provide feedback.
Immediate Post-Cementation
Some patients may experience mild sensitivity in the first few days after veneer cementation. You should avoid extremely hard foods for the first 24-48 hours. Normal eating and speaking typically resume soon after the procedure for most patients.
An adjustment period is normal — your veneers will feel new, and this feeling is typically brief. Your dentist may schedule a follow-up appointment to check on your adjustment.
Caring for Your Veneers After the Procedure
Immediate Aftercare (First 24-48 Hours)
Proper veneer aftercare begins immediately after your veneer cementation appointment. Some patients experience mild temperature sensitivity during the first few days, which is typically temporary. You should avoid extremely hard, sticky, or chewy foods initially.
Be careful when biting into hard foods during the adjustment period. Any discomfort typically goes away within a few days. If sensitivity persists or worsens, contact your dentist.
Daily Oral Hygiene
Good veneer aftercare includes brushing twice daily with non-abrasive toothpaste. Floss daily, being careful around veneer margins. Use a soft-bristled toothbrush to avoid scratching the veneer surface. Continue your regular oral hygiene practices as you would with natural teeth. Electric toothbrushes are typically fine to use — just apply slight pressure.
Dietary Considerations
While veneers are long-lasting, they’re not indestructible. Avoid using your front teeth to bite extremely hard objects. Be cautious with very hard foods, such as ice, hard candy, or nuts. If possible, minimise staining substances such as coffee, tea, or red wine. However, porcelain veneers are more stain-resistant than natural teeth, so moderate consumption of these beverages is generally acceptable with proper oral hygiene.
Protective Measures
A nightguard is recommended if you grind or clench your teeth. These habits can damage both veneers and natural teeth. A mouthguard is essential for contact sports or any activity with a risk of dental trauma. Avoid using your teeth as tools to open packages or to bite nails. These habits can damage veneers just as they can damage natural teeth.
Regular Dental Visits
Continue routine checkups and professional cleanings as part of your veneer aftercare. Most patients should visit their dentist every six months, or as recommended by their dental professional. Professional monitoring helps maintain veneer integrity over time. Early detection of issues enables timely intervention. Regular care contributes to the longevity of your veneers.
Longevity Expectations
With proper veneer aftercare, veneers can last many years. The lifespan varies based on individual factors, including your oral habits and maintenance routine. The quality of placement and your ongoing care affect durability. Eventual replacement may be needed over time. Individual results vary based on oral habits and maintenance practices.
Follow-Up Care and When Additional Appointments May Be Needed
Scheduled Follow-Up
Your initial follow-up typically occurs 1-2 weeks after veneer cementation. During this visit, your dentist checks the adaptation of the veneers, bite function, and gum response. This appointment provides an opportunity to address any concerns or minor adjustments you may have. Your dentist will assess how well you’re adapting to your new restorations.
When to Contact Your Dentist
Contact your dentist if you experience persistent sensitivity beyond a few days or discomfort when biting or chewing. You should also reach out if you feel that your bite is “off” or your veneers feel too high. Sharp edges or rough areas on veneer margins should prompt you to schedule an appointment. Gum irritation around veneer margins, or any visible changes or concerns with the veneer’s appearance, also warrant contacting your dentist.
Possible Adjustments
If minor adjustments are needed, these typically include bite refinements, edge smoothing or polishing, or addressing marginal concerns. These adjustments are typically minor and quick to complete. Most patients adapt well without needing significant changes after veneer cementation.
Long-Term Monitoring
Regular checkups allow ongoing assessment of your veneers. Professional cleaning helps maintain the veneer’s appearance over time. Early detection of any complications enables prompt treatment. Your dentist will monitor gum health around your veneers and assess wear patterns over time to help your veneers continue to function well.
Realistic Expectations: A brief adjustment period is normal after receiving veneers. Most concerns go away within the first few weeks. Professional monitoring contributes to long-term performance. Individual experiences vary, but most patients adapt comfortably to their new veneers.
Final Thoughts
The porcelain veneer procedure involves multiple carefully planned steps, from your initial consultation through tooth preparation, laboratory fabrication, cementation, and ongoing veneer aftercare. Each stage contributes to achieving quality results that can enhance both the appearance and function of your smile.
The process requires individualised treatment planning. Choosing experienced dental professionals who understand the technical and aesthetic aspects of veneer placement can help support positive outcomes. Realistic expectations and a thorough understanding of the process can contribute to patient satisfaction.
If you’re considering porcelain veneers, we encourage you to schedule a consultation for a personalised assessment. During this appointment, you can discuss your individual goals and concerns with your dentist. You can also ask questions about any aspect of the procedure and learn whether veneers are an appropriate option for your situation.
Book a consultation with our team to explore your options. We serve patients throughout Windsor, Prahran, South Yarra, St Kilda, Toorak, Malvern, and Armadale. Every smile transformation begins with that first conversation. We’re here to provide the information and guidance you need to make an informed choice about your dental care.